Panasonic PC
The DMU software comes pre-installed on this computer. It is used to control construction machinery, primarily road milling machines. The computer connects to the MainBox unit via a proprietary connector called the “Panasonic Docking Connector” (Panasonic[2]).
Through this connector, the computer is powered directly from the construction machine. It also gains access to a USB hub integrated into the MainBox, allowing the use of various ports. As a result, the computer can communicate over the CAN interface, configure the MainBox, and connect to GNSS receivers. GNSS devices can be connected either to the built-in GNSSBox or to external devices via RS232 connectors.
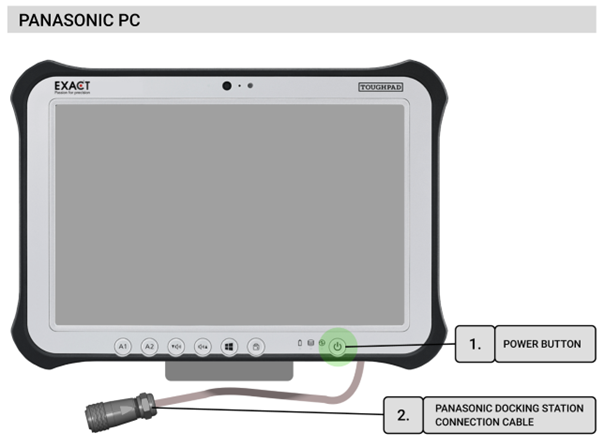
The computer is mounted to the MainBox using four plastic corners, each secured with two screws. This design ensures a firm attachment while also allowing for quick replacement if necessary. Before powering on the computer, all required cables must be connected. A detailed procedure is provided in the “Hardware Installation” section. Once all cables are connected, the computer can be turned on using the Power button Panasonic[1]). After the operating system starts, the DMU application launches automatically.
System Reset
In the event of a system failure, such as loss of GNSS signal or CAN communication issues, it is recommended to perform a full system restart.
Follow these steps:
- Shut down the computer by pressing and holding the Power button (Panasonic[1]).
- Disconnect the CAN cable from MainBox[2].
- Turn off the MainBox by pressing and holding the button MainBox[10] for 5 seconds. After releasing the button, the status LED (MainBox[11]) should turn off.
- Wait 10 to 15 seconds.
- Reconnect the CAN connector to MainBox[2].
- Turn on the computer using the Power button (Panasonic[1]). This procedure helps restore proper system functionality in case of temporary communication failure or signal loss.